Let’s make Joy together with you!
- Marina - AllforDoll

- Jul 26, 2020
- 10 min read
It’s always exciting to learn something new! Today, let’s dive into… how a porcelain doll is created. It’s such a fascinating and captivating process!
Yes, yes… you’re not mistaken… together we will be creating the lovely Joy using the mold by the popular artist Dawn Adams.

This is a well-known doll and doesn’t need much introduction.

All the materials, tools, and supplies I will be using are my own. They’re not new, but I love them very much and they’re comfortable for me to work with. Since all of this may end up in the photos, I want to apologize in advance if it doesn’t look fancy or luxurious; everything is very simple, but convenient.
I will describe everything exactly the way I do it myself. I won’t use phrases like ‘my aunt’s friend said to do it this way…’. You will read exactly what I was taught — the way they made porcelain dolls in the 80s and 90s. Perhaps people do things differently now. It’s hard to say what is ‘right’ or ‘wrong’ — everyone simply has their own process.
So… let’s go!
Everything starts with Porcelain Slip — porcelain in liquid form. I use only Ultra Chic. Ultra Chic is considered the best porcelain for doll-making. I also produce this porcelain myself; you can purchase it in different colors, either by the gallon or by the pint, on my website. Take a look here.

Of course, to make any porcelain doll by hand, we need its mold. I’m fortunate to have the mold for the 24" (61 cm) Joy doll, which was created in 1994 through a collaboration between the artist Dawn Adams and the company Expressions. It has long been out of production.
A mold in this case is a plaster form consisting of six parts: the head, the shoulder plate, two legs, and two arms. My photo area couldn’t fit everything at once, so I photographed only the head, a leg, and an arm so you can see what they look like. And just for fun, I weighed the entire mold — its net weight is 81.5 lb. (37 kg).

You can also choose the color of your Porcelain Slip--thereby choosing the skin color of your doll. I usually work with Delicate Rose, but there are many you can choose from!

To continue the work, we need a container—preferably one with a spout—and a strainer to keep any bits or lumps from getting inside the mold.


This is what the opened mold looks like. We put it together, secure it with rubber bands, pour in the porcelain slip, and let it sit for a while so it can set.


Then we need to lift the whole thing and pour the remaining contents back into the container (since the porcelain part needs to be hollow). For reference, one of Joy’s legs filled with porcelain slip weighs 25 lb (11 kg). So we have to lift all of that, tilt it carefully and slowly to let the slip drain, and then hold the mold in the air for a few more minutes so the rest of the mixture can flow back into the container.
Now we need to place the mold upside down, with the opening facing downward, on some kind of mesh stand for 3–4 hours so everything can fully drain and set… ‘firm up,’ so to speak.
You will probably read this topic in about 20 minutes — meanwhile, creating this doll will take me about a week :) So with a wave of a doll-maker’s magic wand… 3–4 hours have passed. And we begin carefully opening everything and removing the pieces.

The piece (whichever it may be: head, leg, etc.) that we are retrieving is called Greenware. And in order to work with it any further, we need to leave it for a day, carefully laid on some soft surface--so it doesn't break-- and covered with thin plastic.

One day later...
Now the first firing comes into play. In the process of creating this doll, we will have three different types of firing — Soft Fire, High Fire, and China Fire.
The first one is called Soft Fire. The greenware pieces are placed into the kiln.

This is a specialized kiln, and for a specific type of firing, these kilns use specialized cones that are placed inside. Each cone (they all come in different colors and numbers) is, so to speak, ‘programmed’ for the desired temperature in the kiln. For this particular Soft Fire, a yellow cone is used, and the firing takes about one to one and a half hours, though it depends on the size of the kiln and the amount of greenware inside.”

After this procedure, we take out the pieces, which are now slightly hardened by the firing — these are called Soft Fired Greenware — and begin cleaning them.


Very carefully and gently, because they are EXTREMELY fragile (one wrong turn and that’s it… you’d have to start over, as you can’t reattach a broken finger). So, we start removing seams, smoothing out bumps, and cleaning lines using a scalpel, cleaning brush, and Green Clean. I clean these Soft Fired Greenware only when they are wet, in order to minimize the risk of inhaling ‘dry porcelain dust’ into the nose and lungs. It’s harmful and even somewhat dangerous.

Next, we refine the sculptural details of the pieces: defining fingernails, finger creases, and so on.
During the ‘cleaning’ process, the head requires a special approach — we need to carve out the eyes, and not just carve them, but also clean and smooth the inside. First, you should methodically and carefully, using a scalpel with a diamond tip, make circular motions with almost no pressure until the ‘eye’ comes out. To clean and shape the eyes from the inside, we will need special tools that resemble small ball-shaped files. Due to their roundness and rough texture, they grind the inner surface of the eye socket, shaping it to fit the convex glass eye that will be inserted from the inside. Several different sizes of these ball tools will be required.


It is also at this stage that the signature of the artist who created the doll is applied. In general, they write whatever they like, but usually it’s the artist’s name or initials and the date. This date represents the doll’s ‘birth.
So, all our Soft Fired Greenware pieces are now ready for the second main firing. The second firing is called High Fire, and it is this firing that will turn our pieces into true porcelain.

The refined, cleaned, and sculpturally detailed Soft Fired Greenware is placed into the kiln at a VERY high temperature, which is regulated by a pink cone numbered 6 (cone #6). The pieces stay in the kiln at this temperature for about 5–6 hours, and after the automatic shutdown (when the cone has melted), they continue to cool for some time. High Fire also differs from other firings in that the pieces are fired on a special sand called Silica Sand.

5-6 hours and one day later...
I’m sure you can see the difference in the photos: it’s evident that the pieces become significantly smaller after high firing, which makes sense. Here are photos of two hands: one is Soft Fired Greenware, and one has already undergone High Fire. At this stage, they can really be called porcelain pieces, or High Fired parts.


Here's another comparison with three heads (in order as pictured, left to right):
High Fired Head -- porcelain
Soft Fired Greenware Head -- completed Soft Fire and ready for cleaning
Greenware Head -- Just retrieved from its mold

Before starting the painting, the porcelain pieces must be cleaned, rinsed, and allowed to dry. The pieces should be perfectly smooth.

Now comes the third firing — the China Fire — which is the painting of the porcelain pieces with specialized paints whose fixation occurs only in the kiln.

Let's start painting!
I use Expressions Eye Colors, which I bought from Dianna Effner. They are fixed at cone 017, 018, or 019, come in a dry form, and are diluted with a special medium.

For those who want it, there is a painting guide by the author herself, Dawn Adams, but I somehow… do it on my own…


I won’t bore you with the painting of every eyebrow or eyelash; I’ll just say that the China Fire process is done several times — some people do it three times, others five. It’s very individual. First, the shadow areas, light strokes, and blush are applied — all of this goes into the kiln for fixing, approximately an hour in the kiln. This paint will never dry in the air; it is fixed only through firing.
During the second firing, you apply everything in more detail — you paint each eyebrow hair, make the lips more defined, add light gum lines between the teeth, and so on. The convenience of China Fire is that when you apply each subsequent layer of painting, the previous one (after firing) will not run or smudge; it is fixed, and you can “paint over” it however you like — the layers do not blend with one another. Also, for example, when the face painting is finished and everything is fixed through firing, you can put the head in water, even for a week… and nothing will happen — the paint won’t run at all. Everything will stay exactly as it is.
At this stage, between the painting and the China Fire firings, you can also test-fit the eyes. At this point, the doll can already be seen taking shape, so it’s helpful to add paint colors directly based on how they look with her eyes. This is more or less how she will look. I painted her face in soft pastel tones that suit this eye color better.


I’ll be honest: I’m crazy in love with the color lavender. When the lilacs bloom, it’s pure balm for the eyes… So I decided to make the girl in lavender–lilac shades.

If you decide to purchase such parts, such a kit, you can easily create the doll yourself — exactly the way you want and imagine her. I have doll-making kits for sale, already prepared for painting, and if you need Joy, feel free to contact me - info@allfordoll.com
You can also paint her as a blonde, a brunette, a redhead with freckles… and this way you will create your very own, completely unique doll.
But let’s get back to our star!
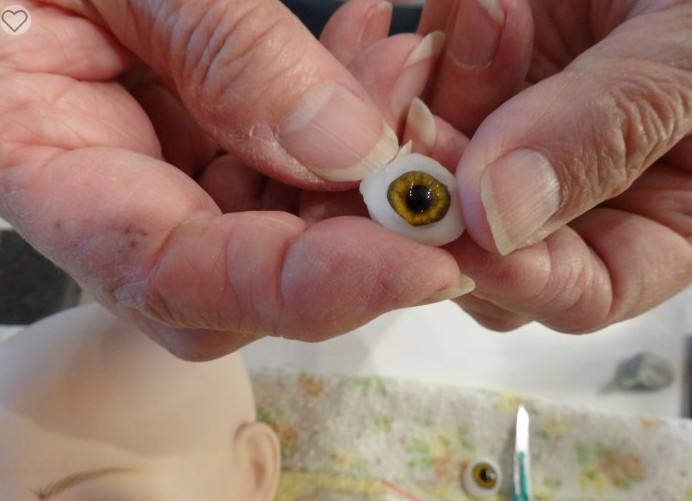
The very first thing we’ll need to do is attach the head to the plate. Oh! Right! The eyes! How to attach them… I forgot… I didn’t take photos, so I’ll show you using another doll, but the process is identical and quite simple. These are my photos as well, taken a few years ago when I was inserting eyes for the first time in my life. My teacher Delores is helping me in the photos.
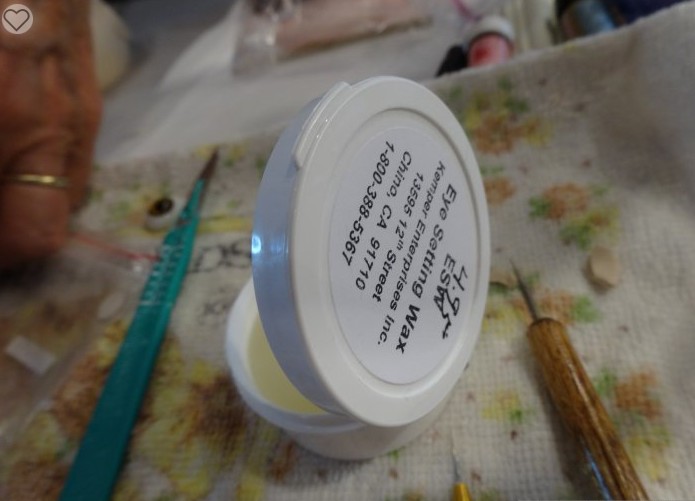
We will need the eyes you selected and eye setting wax. First, we outline the eye with the wax.


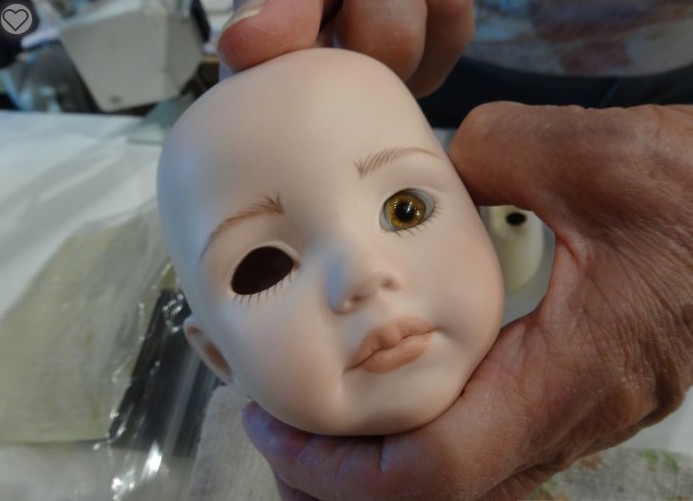

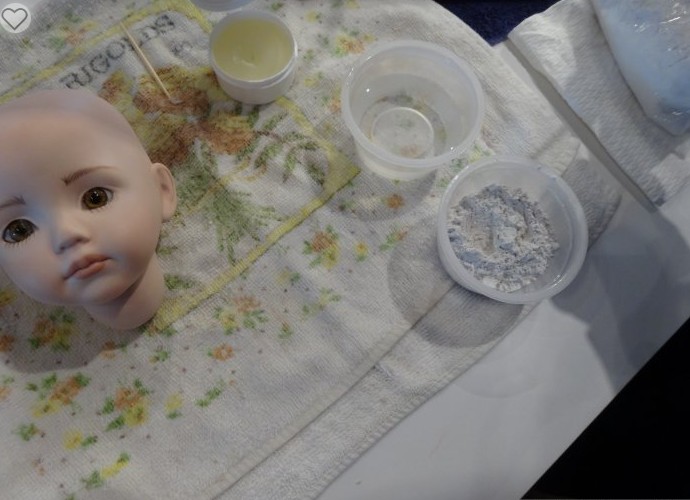

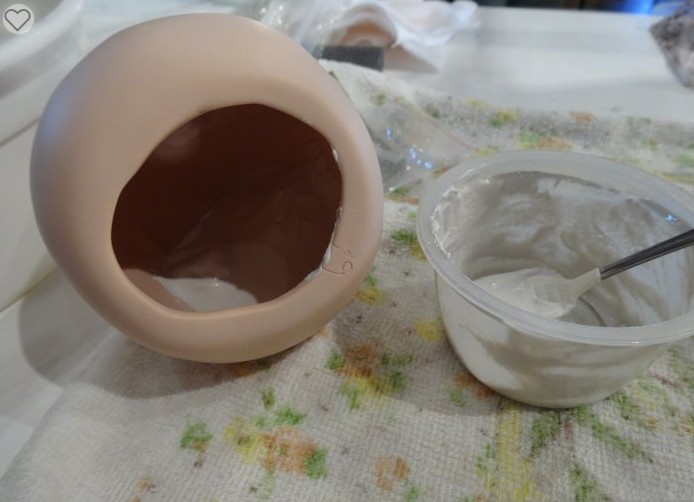
And we attach the eye inside — first one, then the other. Thanks to the eye setting wax, they stay in place and don’t fall off. Then we mix any plaster compound; I use Perfect Plaster + water until it reaches the consistency of sour cream (not thick farm-style sour cream, but a bit thinner — though not too runny, otherwise it may leak onto the face). We pour this mixture over the eyes inside the head, making sure to completely cover the eyes. Let it sit and set, preferably for a full day. Then we glue on the eyelashes.
This is how she’s looking already :)

Alright, let's move on.
We attach the head and the plate; before that, we apply elastic tape to the neck area of the plate, or you can replace it with a cut piece of felt — it will need to be glued in place.


To connect the head and the plate, we will need a special attachment holder. We thread a string through the metal loop.

Then we pass the whole setup through the head, catching the opening in the plate, and begin tightening the string. With the help of the spring, we pull the metal loop through the inner opening of the plate and quickly insert the pin into the ring, then remove the string. All done.

This is how it should look inside. This is another doll, but the mechanism is the same — it’s just that Joy’s plate is larger, and it’s impossible to get a camera in there.

This is how she’s looking already :)

Now we need to attach the body — here it is. I didn’t sew the body myself; a lady made it for me. But for those who have even a little experience with a sewing machine, it won’t be difficult, and, moreover, a body pattern is available.


We insert the body inside the plate and pull the upper elastic bands through the holes in the arms, then attach the legs. Inserting the legs is really not a problem — using regular glue and adding some polyester stuffing inside the leg. We untie the waxed thread, apply glue to the circular cut, insert the leg into the body, and pull the waxed thread as tightly and securely as possible so that it fits into this edging, then tie knots.


Now we need to make a hook in the arms. To do this, take the doll’s arm and lightly stuff it with cotton or polyester filling.

Now we’ll need something like putty. I use Water Putty. We mix this powder with cold water until it reaches the consistency of a fairly runny sour cream.

Using a regular syringe, fill the hole with liquid directly onto the cotton, then insert the hook.


Allow the assembly to set for about 24 hours. Before attaching the doll’s arms to its body, it’s recommended to wrap the doll’s fingers with bubble wrap and foam for protection.

To attach the arms using a rubber through the hooks, we will need a tool like a hemostat clamp.

We need to stretch the rubber as much as our strength allows and secure it with the clamp so it doesn’t snap back. While it’s held in place, tie a strong knot—preferably more than one—and, if possible, apply a drop of glue to the knot. Once we remove the clamp, the doll’s arm will return to its position due to the tension. Repeat the same process for the other arm.


Our doll will be in a lilac color, so let’s make her a beautiful stand out of lilac flowers. By the way, the flowers will also help keep her legs from spreading apart.


And that’s it! Now all that’s left is to finish the doll: trim the threads, remove any glue, glue the doll pate, and choose a wig…


And, of course, dress her up!


I think it turned out really nicely :)
I can’t say it was difficult, but there were some inconveniences—plus, at 61 cm tall, the size definitely makes itself known… but I really enjoyed making her. She’s very beautiful :) By the way, Joy comes in two “sizes”: 24" (61 cm) and 19" (48 cm). I have both molds, so I can create Joy in either size.
In general, what you’ve just read is more of an overview—the main steps of how a porcelain doll is made. But there are also pitfalls, the secrets of a master, and the experience that can only be gained through practice, not to mention the advice of my teacher, who is almost 90 years old—that’s priceless…
Now that you know the whole process, you can imagine everything the doll has to go through to end up standing beautifully on your shelf, radiating immense love for you. When you have a moment, approach them quietly, smile, and once again thank them… for their selfless love…
Always yours, Marina – AllforDoll - MAFD


Comments